Shack-Hartmann wavefront sensor

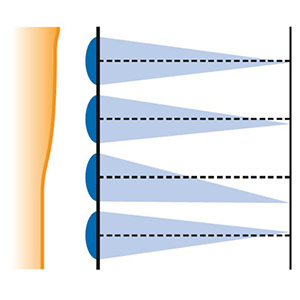
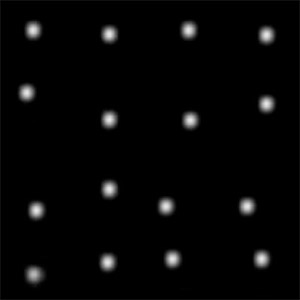
The fundamental principle, however, stays the same: the local inclination of the wave-front across the microlens array causes a distortion of the spot array. Each spot is deviated from the local optical axis of its microlens depending on the ray direction. Thus, the spot position is a measure for the wave-front inclination and the ensemble of all measurement points can be used to reconstruct the wave-front by using numerical methods.
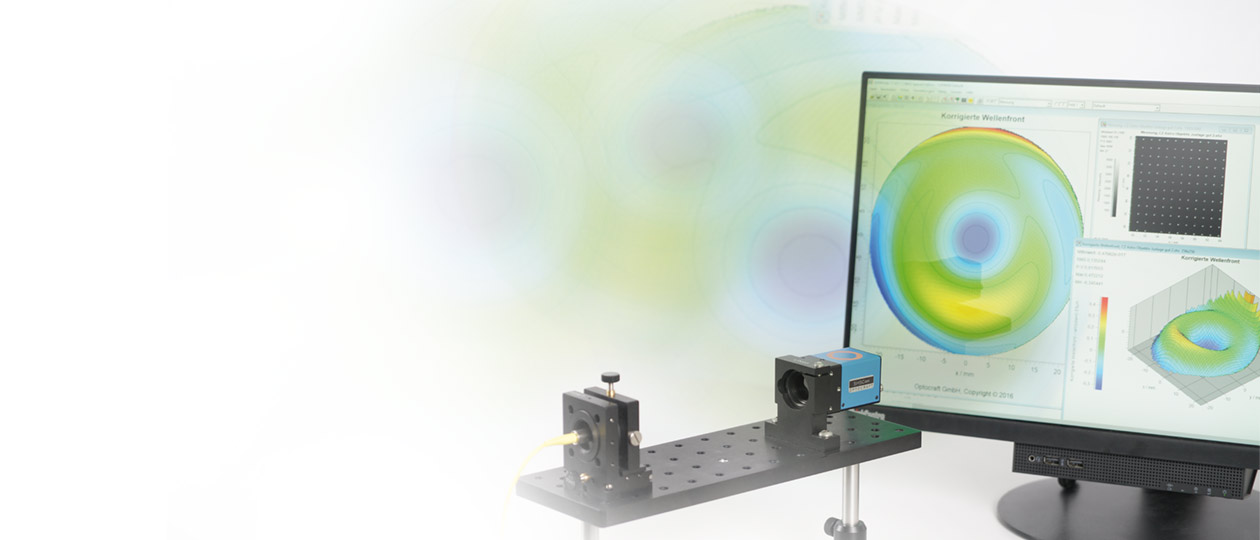
Depending on the application, further data analyis and evaluation can be done to calculate the parameters containing the relevant information on the specific sample under test (see also the links below), for example
- laser beam parameters like beam waist, divergence, M²,
- for optical systems the point spread function, modulation transfer function,
- for contact or intraocular lenses the refractive data, power map, etc.
and by combination of multiple measurements we can also calculate parameters like
- field curvature
- chromatic aberrations
- polarization effects


Why Shack-Hartmann?
Thanks to the geometric optical principle, Shack-Hartmann sensors work without a simultaneously needed reference wavefront. This is a big advantage compared to interferometry. Also, the requirements concerning environmental conditions and the light sources are much more relaxed:- “Single shot” technique, i.e. wave-front evaluation of single camera frame is possible
- High intrinsic stability
- Usable within broad spectral range
- Usable with low coherent light
Why Optocraft?
For more than 20 years we focus on optics testing. You will find this expertise in our software and in the layout of our instruments as well as when talking to one of our colleagues.
Optocraft’s wavefront sensors and systems offer a set of additional advantages:
- Excellent unreferenced accuracy
- Extreme dynamic range
- Fast wavefront reconstruction
This high accuracy is particularly helpful in applications like e.g. laser beam or laser system testing where a referencing of the wavefront sensor with an ideal wavefront is often difficult or impossible. SHSLab’s outstanding wavefront mesurement accuracy allows working without additional reference measurements.
Furthermore SHSLab uses unique algorithms that enable measurement of wavefronts with extreme dynamics, i.e. with very strong aberrations and large tilt and defocus.
Industrial image processing
With industrial image processing we refer to the application of dedicated cameras, optics and algorithms. Optocraft applies industrial imaging processing to
- locate the position of lenses precisely
- detect marks and engravings on optical surfaces,
- measure geometric properties and shape,
- and also to gain information on cleanliness and intactness of the sample under test
For this, we use only high quality components that meet the demands of the corresponding application. In addition to standard components available in the market, Optocraft develops light sources, optical systems and algorithm on their own to optimize functionality and performance of their systems.
Systems for optics testing
The testing of optics such as lenses, beam expanders or ophthalmic lenses can be performed using different measurement configurations. Optocraft offers modules and devices for this purpose in ‘single or double pass’, as well as in ‘null test configuration’ or in ‘non-null test configuration’.
1Xpass vs. 2Xpass
Depending on the type of optics, a single pass (1Xpass) or double pass (2Xpass) test setup is preferable.

Both approaches offer advantages and disadvantages, which are more or less important depending on the application and the type of sample. For example, precision optics such as microscope objective lenses are usually tested in double-pass configuration, as this achieves a very high absolute measurement accuracy since we can calibrate very well.
Systems such as subassemblies or projection optics, which by design generate highly aberrated wavefronts, are preferably tested in single pass. This is because the relay of the wavefront from the sample to the wavefront sensor becomes more difficult with increasing aberrations. Thus, in such a case, it is more favourable if the sample is passed only once and its aberrations are not amplified by a factor of two.
Null test vs. Non-null test
In IOL and contact lens testing, high speed and ease of use are important. Therefore, our devices for testing such lenses are designed as non-null test systems. This is because the sample under test does not have to be precisely adjusted in all three spatial directions as in the case of a null test. In addition, the measurement in the non-null test enables direct determination of the refractive power. It should be noted that for lenses with high refractive power, a null-test configuration may be advantageous.

Relay optics and imaging
To match the detection area of the wavefront sensor to the test pupil, we use Kepler telescopes as shown in the sketches. This is because a Kepler telescope is able to map the sample pupil onto the wavefront sensor, too (which is not the case with a Galilean telescope, for example). And this is essential to avoid propagation effects, which otherwise would affect the measurement accuracy.

In the configuration shown above, the collimated beam is transformed by the Kepler telescope into a collimated beam with a different beam cross section. However, a second task of the telescope is to sharply image the pupil of the specimen onto the wavefront sensor.
Therefore, the telescope ensures that the real image of the sample is located on the microlens array of the wavefront sensor, effectively eliminating measurement artefacts caused by wavefront propagation between the plane of the sample and the measurement plane.


